Whenever I look at a great picture in a magazine or in a gallery or even on the web, almost instantly there’s a voice in my head that says, “I should try that. It looks so good. I’m inspired.”
99% of the times there’s a much louder voice that checks me and says, “Only if I had the proper gear and the access to a studio and props and models and lenses and camera…”. The list goes on.
If you have experienced the scenario mentioned above or any of its variants, you should read further.
One of the biggest photography related hurdle I have experienced apart from ‘Photographer’s Block’ was the inability to love my gear. To come to terms with the fact that whatever lenses and camera I have are great. To accept them wholeheartedly and love every moment I spent with them. The need and inaccessibility of newer gear leads to a dissatisfaction with your present equipment.
Most of us are crippled by the thought of technologically advanced sensors and bigger and better camera and faster lenses. Ask yourself – Is my current gear really making me lag in the wonderfully adventurous and exciting photographic journey I once undertook?
Here are some of the things I did (and you should too) to overcome this hatred (if you may) of the gear I have:
1. Learn What You Have
I think it has been emphasized enough everywhere but I’m going to say it again – Read the manual. It’s the best piece of documentation you have on your camera. If you haven’t read your camera manual yet, do it and you’ll be amazed at what you can learn from it. There must be about 50 functions you don’t know about your camera yet. What does that little button next to the pop-up flash do? What’s that symbol on the display? How do I lock the focus on the subject? There’s just one answer – Read the manual.
Knowing your camera is like knowing a person. Once you know you are close and know them inside out, it’s hard keeping yourself from loving them.
2. Do-It-Yourselves and Make your own gear
Don’t have access to a studio? No problem. Make your own home studio with some white sheets and lights. Don’t have an external flash to light your portraits? No problem. Flash Lights galore!
There are many DIY websites that help you design many photography accessories yourself for cheap (external flashes, lightboxes, backgrounds – you name it!) It’s fun to make anything new and you’ll be surprised what your current gear has to offer you and how you can enhance it by just some simple DIYs. They’ll make you love your camera more and open up new genres of photography too.
The motto here is to make your own gear. You can. I did.
3. Look At Your Shutter Count
Have you used your camera enough? Are you sure you’ve exhausted and taken the most out of the kit lens before you go for that prime? In most cases it turns out we haven’t even used the current lenses and camera to their maximum potential. Check the shutter count of your camera. If you find it too low (say less than 15K), then you haven’t really used it enough and chances are you won’t be using your updated gear either.
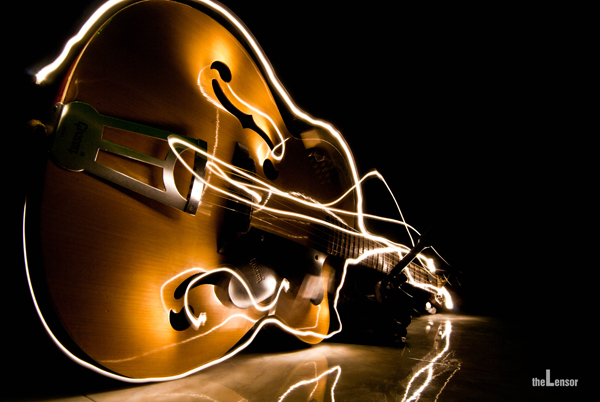
Have you shot light trails or tried light painting? How about self-portraits? Abstracts? HDRs?
Get out with your camera and start clicking.

Light Paintings are a fun way to explore and learn your camera funtions.
4. Substitution
So, you’ve heard the 50mm prime lens is the best for street photography and portraits. Most of the street-photographers out there shoot at 50mm on f/4 and since you don’t have it you want to buy it so you can start off with your street photography. So how does the 18-105 that came with my camera body help me here? Simply put, you can use substitution. Just adjust to 50mm and there is a fair chance you can easily get somewhere close to f/4 – f/5. You can shoot excellent portraits with the kit lens.
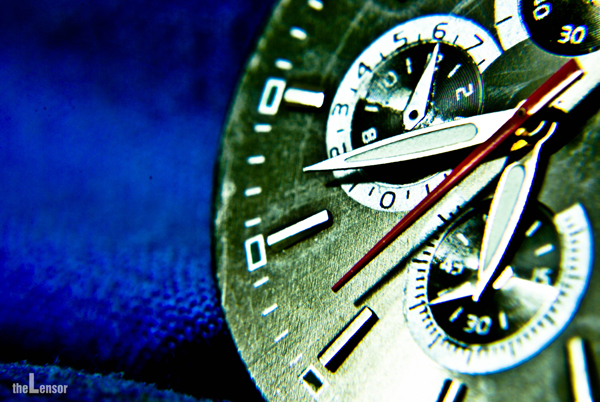
You want to give Macro photography a go. But macro lenses cost a lot. And you’re not even sure if you’ll like that genre of photography and don’t want to invest money in the lens. Thankfully, we have the internet which is full of ways to help you out. Check out Diopters/Reverse Mounts/ Extension tubes and see if Macro is for you. There are many products available which can fulfill these special needs and are easier on the pocket.

This picture was taken using a pair of Diopters (Macro filters in popular internet language)
EXIF Data: Camera :Nikon D3000; Exposure: 13; Aperture: f/22.0; Focal Length: 60 mm; ISO Speed: 100; Exposure Bias: +2/3 EV; Flash: No Flash
The idea is not to stop but look for things that might stand in for real gear.
5. Google Your Gear
Most of the time, we find ourselves incapacitated not by our gear but by lack of ideas. The internet comes in handy here. Most of the websites (including Flickr) offer a search filtered on the basis of your camera model and lens. Search your camera/lens and you see what can be accomplished using your gear. Even a simple Google search of “<Camera Model> + sample images” returns a huge amount of images you can work on. Now you can’t tell yourself you have used your gear. Try to take pictures like these and then better their quality.
As I said before, there’s so much to explore yet and you can’t really hate what you don’t know.
6. Join a community group with the same gear or interests.
Join a community group on Flickr or any other website that concerns your camera or lens(es). This would open you up with people using the same set of equipment and taking breathtaking pictures. There are DIY groups that post tutorials regularly and answer queries. Be socially active. Ask them for any tips they have. Join a discussion. Learn and grow.
7. Read EXIF
Flickr allows a photographer to share his EXIF values with the viewers. That’s one of the best things about Flickr. Now that you have searched an image with your camera model try reading these values. You’ll get a fairly good idea how a certain picture was taken. This would not only make you content with your gear, it will also improve your photography.
Note: Some of the photographers are not that generous and don’t share EXIFs. Don’t lose heart; there are plenty of photographers that do (including me).
8. Learn Post-Processing
When I started photography, the web disheartened me. There were so many pictures that were so much better than mine. Pictures of everyday objects, with nice popping colours and
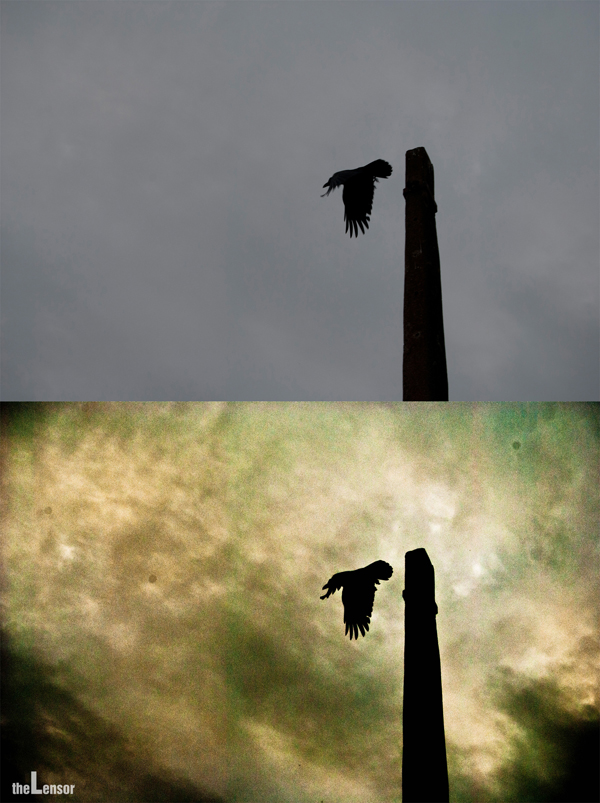
brilliant contrasts, deep blacks and tints. I was crestfallen. Why can’t I make that soda can look that pretty even though I did everything by the book? I got my answer after I spent a little time browsing through these pictures. PHOTOSHOP. Now I’m not talking about photo manipulation. That’s a totally different area. Learn the basics. Adjust contrasts and exposure. Play around with saturations and highlights and shadows. These are things that you can’t usually achieve in camera (OK! OK! You can but that’s discussion for another day). You’ll be surprised beyond imagination what 2 minutes in Photoshop (or any other post-processing software. GIMP? Anyone?) can do to your pictures. If your camera supports exposure bracketing (read the manual my friend) why not give HDR a go?

An example of what a little time spent in post-processing can do to an otherwise bland image. Total time spent in Lightroom : < 3 minutes. Parameters adjusted: Contrasts, shadows, highlights and saturation.
I’m sure if you think and implement what I have said in this article, you’ll not only enjoy your photography equipment more, you’ll also improve a lot. The idea here is to learn and enjoy your camera with all its shortcomings (if you still want to believe they are shortcomings). Just keep clicking and learning. And when you can take mind-blowing pictures with your present equipment at all times; when you can use your camera like a Samurai uses his sword (sorry for the lame analogy but you know what I mean); and when you want to exceed that – you’ll know when the time is right for an upgrade. So until then, love what you have and enjoy.
I am adding a little description of the camera and lenses I use. Be the judge yourself of how important gear is:
- Nikon D3000 (I have read reviews calling it the worst DSLR Nikon ever came up with; I made faces when I read that and didn’t pick up my camera for a week.)
- Nikkor 50mm f/1.8D (Doesn’t autofocus on my camera body; I used to cry about that.)
- Nikkor 18.0-55.0 mm f/3.5-5.6 (The DX Model; No Vibration Reduction)
- 55.0-200.0 mm f/4.0-5.6 (The DX Model; No Vibration Reduction)
Never stop clicking!
Anant. (The Lensor)
–
Anant Nath Sharma, a 26 year old self-taught photographer based out of Pune, India. Currently pursuing street and fashion photography; taking pictures that tell stories and enjoying every moment of it.
Blog: www.thelensor.tumblr.com
loved evry bit of ur article!
Thanks Aritra. 🙂
Very true about the gear. Most people say you NEED a 500mm lens for birds and other wildlife. I don’t have one, but still I manage. Patience is what it’s all about!
That is so true. I shot the moon with my 55-200 lens. And I’m pretty satisfied with the result.
Makes me appreciate the limited resources I have even more now. Time to get creative. Thanks for a great article, Anant 😉
Thank you Kavitha. You are too kind. We can have all the fancy equipment in the world but without creativity it would equal naught.
Well said.
Everyone should be reading this.
Thank you for the nice words KGB! That’s quite an encouragement for me .. 🙂
One little hint, download the camera manual PDF’s to your phone so you always have them with you.
Just what I needed to read – thank you!