Recently we reported that the brilliant Eye-Fi wireless SD card was finally making its way to the UK . Well, this morning I am more than excited to have escaped the postal strike and received a 4GB Eye-Fi card.
I can’t wait to get playing with this ultimate web 2.0 camera accessory. I am curious to how the system works and how it will cope with photos from a digital SLR camera. In this post I going to explore just how easy it is to set up the Eye-Fi card and put it through its paces.
The Eye-Fi has an obvious advantage in the photography market and although I am focusing on the advantages the Eye-Fi card offers to photographers the tiny SD device can manage video just as well as it handles images. In fact there are dozens of practical video applications for the wifi device. Eye-Fi also supports direct video upload to Flickr, YouTube, Facebook etc.

1. The Unboxing
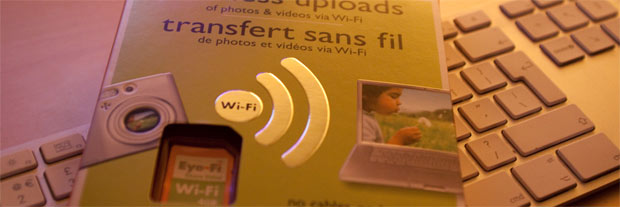
The Eye-Fi arrives in a box slightly larger than a CD case. Inside you will find a quick start guide. A USB SD card reader and obviously the little orange SD Eye-Fi card. I can remember having SD wireless devices for my old PocketPC but they were always considerably longer than a standard SD card. It is hard to believe this little card not only stores 4GB of photos and video but also offers full wireless access.
There is no software CD included with the Eye-Fi package instead all the software you need actually comes installed on the Eye-Fi card. No more carrying CDs of software or finding you arrive at a computer without the necessary driver. Simply connect the SD card to any computer and you can easily install the necessary software (if you have to make wireless network changes etc).
Connect the Eye-Fi card to your computer and double click the “Start Here” folder to install the necessary software.
2. Software Setup
Inside the “Start here” folder you will find a Mac OSX install folder. Double click on the DMG file within the folder and the following screen should appear.

Drag the Eye-Fi application icon into your Applications folder, then double click the icon to run the install software. A few seconds after running the Eye-Fi application it discovered the Eye-Fi device, loaded the default web browser and asked if we wanted to start the sign up process.
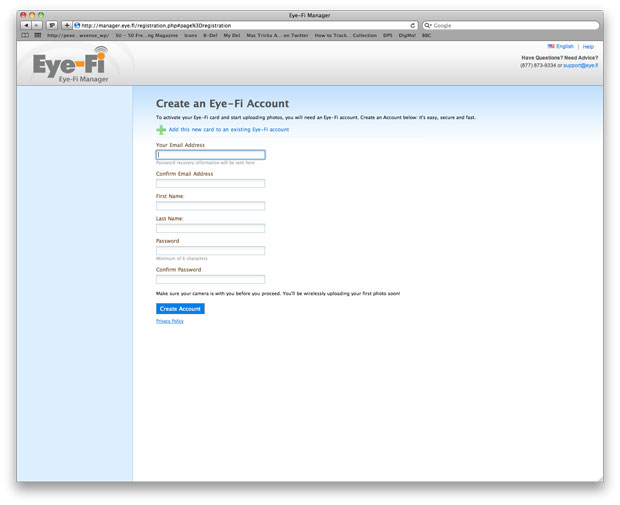
The first stage is to set up an Eye-Fi account. This a quick process, simply enter in your personal details with the most important being email address and password. Eye-Fi will email you to confirm your address and you can set up the system to email you each time a new photo is uploaded.

3. Setup Wireless
Once your account is verified you can now set up the Eye-Fi card for your wireless network. A drop down list of the available wireless networks will automatically appear. Select the appropriate wireless network and if necessary enter in your WEP or WPA key. The Eye-Fi card will now attempt to connect to the Eye-Fi server to verify connection.

The Eye-Fi wireless card can store the details of up to 32 wireless networks on each card and photos are automatically transferred when the card has network connectivity.
4. Automatic Sharing
As well as transferring photos to your computer you can also automatically share your Eye-Fi snaps with the world via the internet. I knew the Eye-Fi card was going to be good but I really didn’t expect it to support so many online services.
The screenshot below shows the different online gallery services where your photos can automatically be uploaded. As you can see the main players such as Flickr, Facebook,photobucket and MobileMe are all supported. Interestingly you can also share your photos directly with Evernote which is particularly useful in a business or education setting.
 In the interests of testing the system I have decided to set up automatic Facebook sharing but I can imagine using the Eye-Fi with Flickr as a major destination for my photos.
5. Sharing your first Photo
Once you have setup all the photo and video sharing services you want to use it is time to remove the Eye-Fi card from your computer and put it in your camera. I am testing the device on Canon’s 500D camera shooting on large quality JPG files.

I have always found new wifi devices to be problematic on first set up so at this point I was expecting to have all sorts of network problems.
The Eye-Fi was different, within a new minutes I was viewing the photos I had taken of random objects on my desk. Back at the computer I could see the transfer process actually taking place live on screen. Remember you don’t have to have your computer running for transfer the card talks directly to the Eye-Fi servers !

Having set up the automatic sharing with Facebook I nipped over to my FB account. Not only had Eye-Fi managed to upload the images it even placed the photos in an album for easy organisation. The image below shows just two of the photos on my Facebook page.

Eye-Fi for iPhone
If own an iPhone your Eye-Fi card comes with an extra bonus service in the form of a free iPhone application that allows you to automatically upload your photos to your Eye-Fi account. This means you can take a photograph on your iPhone and automatically share it in your Flickr, Facebook and any other support account.
Obviously camera apps abound for the iPhone and there is already the means of posting images directly to Flickr and Facebook but many of the other gallery services are not supported and better still this application offers the ability to share your photos with a variety of galleries at once. (Download the iPhone application free here (iTunes link)).
When you visit your Eye-Fi account online you can quickly view photos uploaded from both your Eye-Fi card as well as the iPhone application.

Conclusion
Eye-Fi is a ground breaking new technology that reinvents the very concept of mobile photography. Phone cameras are booming on sites such as flickr and Digital SLR camera struggle to compete when it comes to the ease of sharing.
Transferring photos from digital SLR cameras means coming homing, connecting the camera to the computer then manually uploading the photos to your favourite sites. Eye-Fi changes this workflow dramatically adding unprecedented functionality to your digital SLR camera, allowing immediate transfer and sharing of your latest photos.
Obviously we suggest a little bit of caution when using the automatic sharing of photos to the likes of Facebook as it could be really easy to end up with the wrong photo shared with your friends in an instant.
Would I recommend the Eye-Fi ? I’d say if you have a camera and a Facebook, Flickr or share photos on any online gallery it is pretty much a must photo accessory. Definitely the perfect present for the photographer who has everything !
The Standard cards (as in this review cost just under £80
Readers Questions
I asked our Facebook and Twitter followers if they had any questions and the two key areas were power and public wireless.
1. Dias Aisin &Chris Brennan : How fast with a big file and how fast does it burn your battery?
I have been using the card for a few hours transferring a range of file sizes from 1MB through to just under 5MB. My camera was on full power and after 20-30 uploads it still claims to be on full power. That said my 500D tends to go from hero to zero when it comes to the battery indicator. Eye-Fi claim :
While taking pictures, your camera’s battery life will not be noticeably shorter than when using a regular SD memory card. Battery life during uploading will depend on the number and size of your photos, as well as the speed of your network connection.
2. Andrew Gribben : how does it handle public access internet such as BT Openzone ?
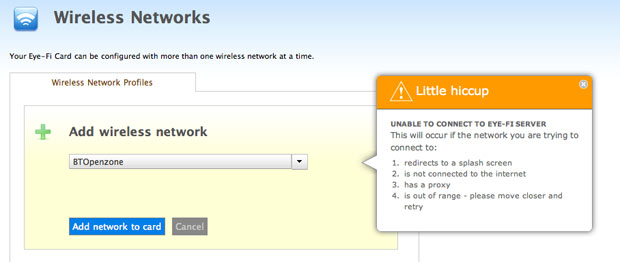
I noted a WiFi hotspot subscription option within the account management area that is currently only available in the US. I assume the WiFi provider has to allow for this type of network access. It appears that WIFI access that has to be authenticated via a web browser username and password is not currently supported. I tried to set up BT Openzone with the following result :

This review was very helpful. I have wanted one of these for sometime but have held off because I shoot mostly in locations that have no Wi-Fi (nature and rural outdoor events). I pre-ordered an iPad with 3G and I am hoping to use that to upload my photos directly to flickr.
does it use my wi-fi to transfer data, or just the hotspots?