Wow! That’s so cool! How do you make the water look like milk? As photographers, we’ve all heard that question more than once and I would call it a safe bet that the vast majority of us have even asked it at some point in our lives.
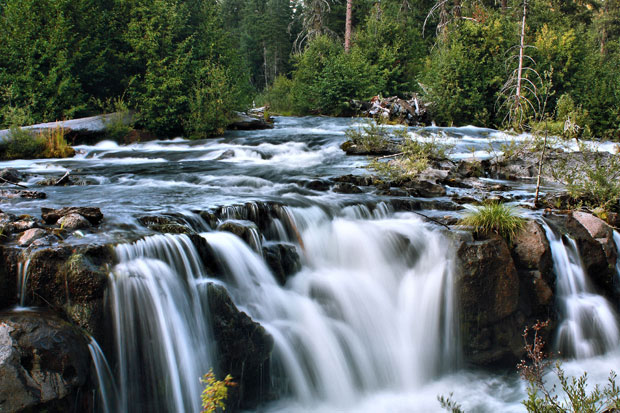
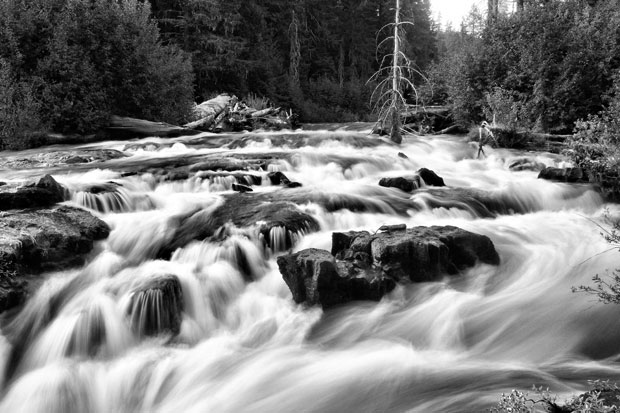
What I’m referring to of course is the motion blur effect that moving water takes on in a long exposure shot. “Time exposures” can produce visually stunning effects and when combined correctly with other techniques such as HDR, can be down right amazing.

Because it is such a cool effect, this is usually one of the first techniques a new photographer will learn. Consequently it tends to get overlooked on the list of instructional tutorials. I guess it’s just assumed that “everybody knows how to do it.” Well, I beg to differ.
How ever simple the process, it helps to have someone walk you through it the first time. So here goes.
What you will need:
1. Camera. DUH!
2. Tripod. A good sturdy one.
3. Neutral Density Filter. Not absolutely necessary but it really helps if conditions are just a little too bright.
4. A good subject.
Lets start with the camera. You need to have some manual options. A fully auto box will not work for this kind of shot. For the tripod, you will need one that’s stout enough to stand solidly still. Your shutter is going to be open for up to thirty seconds (we wont go into”Bulb mode” in this article) so even the slightest vibration will ruin your focus.
As far as the N.D. filter is concerned, it’s just a tool which allows me to get these shots an hour or so earlier in the day than I could without it. Now that we’ve got the equipment out of the way, lets get to the technique. It’s short and sweet so don’t blink or you might miss it.
Taking the Photo:
1. Set your camera on the tripod.
2. Set the two second timer.
3. Frame your shot.
4. Set ISO no higher than 400. 200 is better. Any higher and you start to get noise.
5. Stop down as far as light conditions will allow.
6. Prefocus.
7. Take the shot.
Simple as that! A couple of things I should touch on however,for the real beginners. What do I mean by “stop down”? This refers to your cameras’ F/stop setting. Set your camera on one of its’ manual modes. I use AV (aperture priority) Adjust your F/stop setting to the highest number you can get. I know. It sounds backwards but just remember “the higher the F number, The less light gets in”.

Once you’ve set your F/stop, then prefocus. You will see your settings displayed in the viewfinder. Among them will be the F number and the exposure time. If the F number is flashing it means you’re not letting enough light in, so you will need to lower the F number until it stops flashing. When the flashing stops (sounds like a medical condition. “Please make the voices stop doc.”) Check the exposure time.
If it says anything less than two seconds, there’s too much ambient light and you will have to wait awhile. Once you get exposure times of two seconds or greater you can begin shooting. I usually start shooting at two seconds and continue until I can get to thirty.
While you’re waiting for light, try moving around. You’ll be surprised at how much difference a change in angle can make in the amount of light that reaches your cameras’ sensor.
Well, there you have it folks. Pretty simple really. Experiment with this technique until you get a feel for it and you’ll be getting those “cool” shots in no time. Good luck and good shooting! If you use the tutorial why not add your photos to the Seven by Five Flickr Group and tag them “Long Exposure” ?
About the Author

Stephen Van Tuyl is A photographer, web designer and owner of Dawg Digital Design Studio in Cave Junction, Oregon.
Stephen’s work has appeared in the Bend Bulletin, the New York Times and National Geographic.
Links:
Blog – http://stephenvantuyl.com/blog
Gallery – http://stephenvantuyl.com
Dawg Digital – http://dawgdigital.com
I’ve only tried this a few times, so I really appreciate this post. It’ll certainly streamline my ‘trial and error’ method 🙂 Thanks.
Thanks for the comment Errin. Good luck!
Nice tutorial, Stephen, short and sweet. I’ve taken several photos like this, so I’m familiar enough with the process and it’s definitely a fun way to spend time by the river or by a waterfall or fountain. Works pretty nice in a rain, too.
I do have one comment, though. You say “A fully auto box will not work for this kind of shot.” I kind of disagree with that statement. If you’re talking about disposables and similar cameras I have to agree. However, most digital cameras now, including P&S types, have some sort of timed exposure setting, typically good for up to 20 – 30 seconds. Or a fireworks setting, for example. That essentially works as a TV setting for timed exposure. If you set the timed exposure to 2 seconds or more, as indicated in your article, then the camera will adjust the F-stop to compensate. Here, too, you have to work the light for a good photograph so aside from that one little quibble about being sure you’re talking just digital cameras or not, this is definitely a good how-to article to get up and running with long exposures.
Just nit-picking. 🙂
Awesome and illustrative guide. I like the way you wrote it.
Thanks!
Can you advice on LONG EXPOSURE photography , i.e. several minutes , I use a D3 .
I take it you must use the bulb setting,but how long for ?
Gorgeous pics! Thanks for the tips!
Now put these on a custom view-master reel! 🙂