Most digital cameras on the market are capable of capturing high quality high definition video sadly though despite stunning visual quality the audio recordings are often lacking. Keith Lane talks us through one solution for improved audio capture for multimedia and film work.
Working as an independent photojournalist often means wearing several hats at once. Not only am I the one in charge of photographing the interview, I am also responsible for seeking out the subject, preparing the logistical needs, and acting as the reporter. Case in point: creating and editing multimedia.
As a narrative journalist I love being able tell a great story, and what better way to do so than to include firsthand audio interviews. But wanting to get great audio and actually producing it are two different things. Here are some simple tips I’ve learned along the way.
Equipment
Living in a digital age means options. Head down to your local electronic store or search around on the Internet and soon your head will be swimming with choices. The first thing you need to ask yourself is how much money you are willing to invest. After that, it comes down to weight, size, and capabilities.
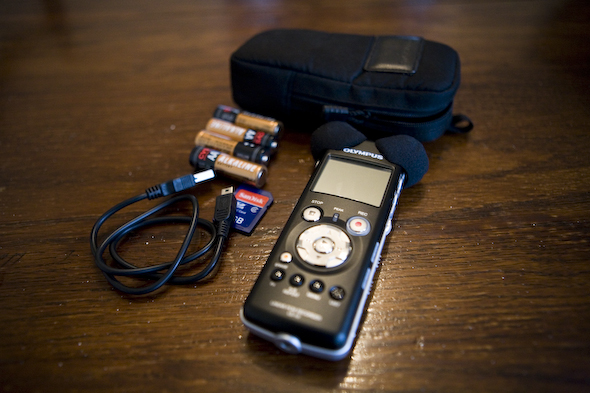
Sure, you can buy an audio recording device that captures sound and video but do you really need that. When the time came for me to invest in audio equipment I asked my friends in radio production and newspaper multimedia what they thought the best option would be. After some questioning and research I chose the Olympus LS-10.

Not only does it fit inside my shirt pocket (I like to travel light) but it’s easy to use and the sound it captures is high quality. And, for the gear hounds out there, it comes with dozens of accessories. There are, of course, other great set-ups out there, but this one happens to fit my needs.
Training
Once you have figured out what recording system works for you, spend time getting to know it. Just like knowing the ins and outs of your camera, it’s vital to know how your audio recording device works. When it’s crunch time you don’t want to be stuck keeping your interviewee waiting. You also don’t want to get home and realize you accidentally didn’t press record.
Setting Up
Other than having a back-up set of batteries and becoming familiar with your gear you’ll need to have a good set of initial questions. While this fits more in the realm of soft skills, it can’t be overstated enough. No questions, no great interview. You can have all the right gear and still lose out on getting your perfect interview by simply not preparing a first round of questions. Not only will this make your time interviewing that much more fruitful, it will also show the interviewee you are not wasting their precious time. I personally like to write down my initial questions in a note book no later than one hour prior to my interview.
Interviewing
It’s interview time and with that comes a few simple tricks. Location, location, location. Choosing the right spot, if you have such an option, can mean the difference between usable and unusable audio. If you have time, get to your location early to see if there are quiet spots to talk with your subject.

If it’s on the fly or there are no such places, make sure to keep the wind at your back. This will ensure, though not fully guarantee, you get the cleanest audio possible. If you have room in your gear bag, you can always pack an external or zoom microphone to help close the distance between the recording device and the interviewer.
Transcribing
Interview done; it’s now time to transcribe. The mind-numbing task of writing down, word for word, your interview can feel arduous. It’s a task I personally dread doing and am beyond grateful for having done afterward.
The best approach is to break the interview into separate tracks, using your audio editing software of choice, and then sit down with your favorite pair of headphones and your computer to start transcribing. Find what works best for you where you are and go from there. Bit by bit you’ll get through it.
Editing
Garage Band versus Audacity versus Pro Tools: it all comes down to preference and what you can afford. When first starting out, use what you have and what you can get by on. After that you can always upgrade.
Storytelling
Now it’s time to pull all of your photos, writing, and audio into a cohesive storyline. This is a subject that truly requires it’s own post. But for now, focus on the basics. Review the transcription and see what themes or concepts are coming to the surface. What is the arch? Where is the story heading? Do you have supporting text and images that can work well with your interview? What should stay in and what should be cut out of the story?
Experiment, play around, and see what works best for you. Take the time needed, as you would with your camera, to become familiar with the equipment and the process. Practice on your friends and family. Mastering the basics of capturing audio first will allow for richer storytelling later.
Links
Twitter: twitter.com/keithlanephotog
Check out my latest work: http://www.keithlanephotoblog.com
Portfolio http://www.keithlanephotography.com
Leave a Reply