If you find you are making the same type of adjustments to photographs on a regular basis then saving the action as a preset is a useful way to speed up your post production workflow.
Alternatively if you are only starting out using Aperture for your photo management processing then pre-made adjustment presets are a great way to learn how to develop your RAW photographs to achieve the look you require.
There are a number of websites out there that offer free Aperture (and Lightroom) presets, one example is www.presetpond.com that offers community sharing Photoshop, RAW processing, Lightroom and Aperture workflows for free.
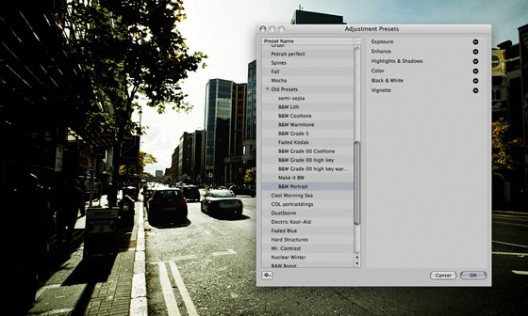
Once you build up a collection of presets it is definitely worth spending some time organising them and culling the ones that you no longer use. To manage presets click on the “Adjustments” tab and then “Presets”. At the bottom of the list you will find two options, one to save a preset (use this to create your own) and one to edit presets.
Click edit presets to manage the adjustments you already have in your library.

I tend to keep my presets organised in folders according to style e.g. Black and White, Vintage etc. Click on the little gear on the bottom left of the window to create adjustment groups or to delete a preset.
There is nothing harder to manage than a long list and personally I have found a long list of presets actually slows accessing each adjustment a little slower as Aperture tries to render a preview of each preset as you scroll down the list.
Once you have arranged your presets in an efficient way you can get to grips with processing your images. Personally I use a preset as a point of reference and generally work each image separately. It is definitely worth treating each photo on its own merits as there are definitely times of ten presets can actually spoil a good photo.
Leave a Reply